How to submit expenses
You have 30 days to submit expenses for a job you have completed.
IMPORTANT - Liveforce do not pay expenses. Any questions about expenses or when they will be paid must be directed to the agency you worked for.
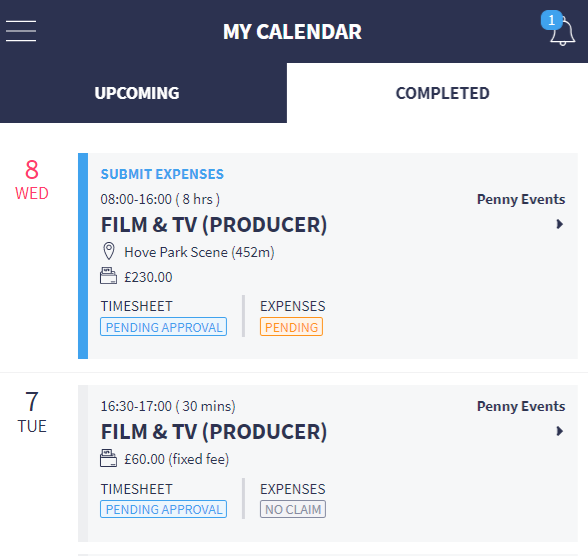
1. My Calendar go to COMPLETED section

2. Click on the job you wish to submit expenses for.
You can access expenses by going to the "Tasks" section and following the arrow.

Or by selecting the very last "Expenses" section

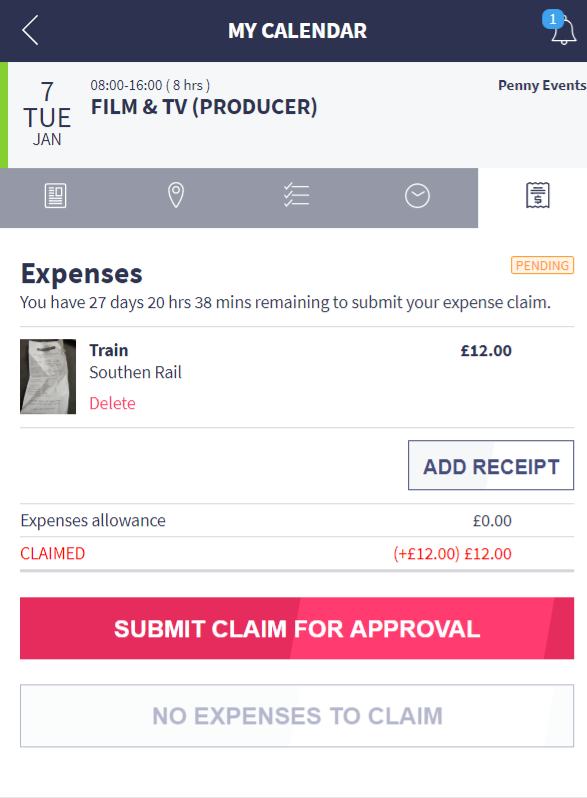
3. Select ADD RECEIPT
4. Fill out all the fields
You will need to provide a description of expense, type, company, cost and upload a screenshot of the receipt

You can use the drop down lists to select a Type

An example of a fully complete expense claim

5. Click ADD EXPENSE
6. Add another expense
If you have more than one expense, make sure you add them all at the same time. To add more expenses select ADD RECEIPT and repeat steps 4 and 5 until you have all your expenses recorded.

7. Confirm Expenses
Select SUBMIT CLAIM FOR APPROVAL.

If at this point you realise you have made a mistake - given the wrong amount or uploaded the wrong receipt for instance, it is possible to change your expenses up until the point where the company has accepted your expenses and added you to a payroll. After this point you will need to contact the company you worked with to resolve. Scroll to the bottom of this guide to find out how to reverse expense submission.
8. Once submitted the status of your expenses will change from PENDING to SUBMITTED

9. The agency will be notified you have submitted expenses.
10. When they approve the expenses the status will change to APPROVED

No expenses to claim
If you have no expenses it is still important that you declare this. Follow step 1 and 2 above then follow these steps:
1. Select NO EXPENSES TO CLAIM

2. Confirm No Expenses
As before, a warning message will pop up to check you don't want to submit expenses, you have the choice to confirm by pressing SUBMIT or if it's a mistake you can CANCEL

Different Status of Expenses
PENDING - You haven't made any claim for expenses yet, nor have you selected NO CLAIM
SUBMITTED - You have submitted expenses and waiting fro approval
NO CLAIM - You opted to not claim any expenses
APPROVED - Your expenses have been approved
PAID - Your expenses have been paid

Reversing Expenses
If you make a mistake with your expenses you can reverse it by following these steps.
1. Select Undo expense submission

2. You will then see another warning dialogue box:

3. Select SUBMIT
4. Select "Delete." The expense will be deleted and you can re-submit correct expense.
Related Articles
Disputing Timesheets and Expenses
